🍵 Making Kombucha
How we made our first batch of blueberry kombucha.

I learned about kombucha while working at Twitter in San Francisco. Twitter had kombucha on tap and my (then) co-worker Matt Knox made his own.
But it wasn't until I started at Google that I truly started to appreciate Kombucha. The micro-kitchen near my team stocks the refreshing GT's Gingerade. It is spicy, sweet, tart and effervescent with barely any calories. Within no time it becomes a daily treat. After introducing Tatyana to it she became a fan too.

Making our on kombucha was the natural next step.[1]
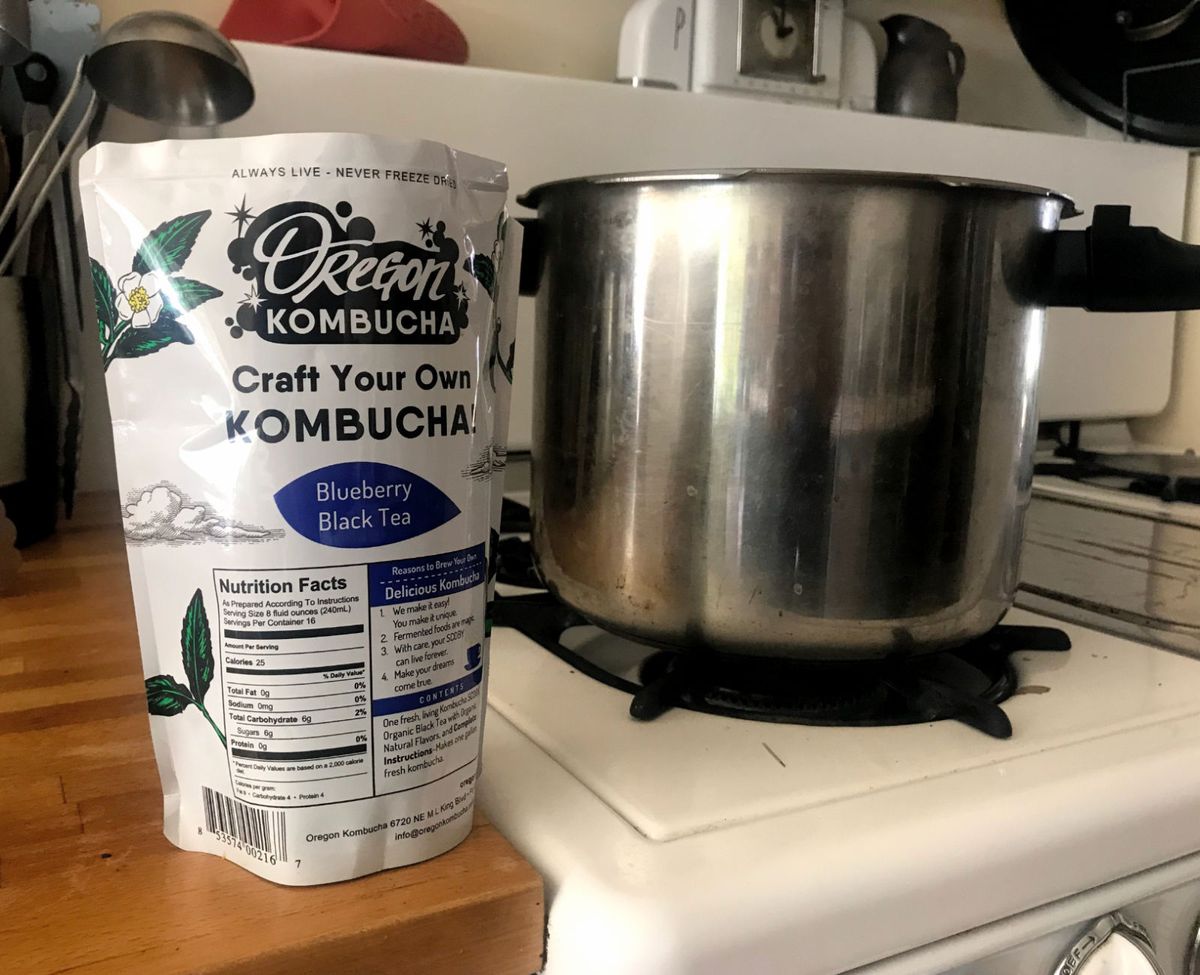
For our first ever kombucha we needed to acquire the kombucha culture. Similar to getting sourdough starter before you can make sourdough bread.[2] We could have asked around to get some from someone who was already making kombucha and could split off some of their culture. To make things simple we purchased a starter kit from Oregon Kombucha instead.

Our Basic Blueberry Black Tea Kombucha Starter Kit came with:
- live Kombucha culture aka. the scoby,
- organic blueberry tea and
- a brewing guide
Step 1 — Brew sweet tea
Start by brewing the tea. Bring water to a boil, add the tea with some sugar and let it steep for a few minutes. The sugar will feed the kombucha. For our 1 gallon batch, we added 1 cup of sugar.
Step 2 - Let cool & add scoby
After steepening the tea, remove the tea bags and let the tea cool off to room temperature. Pour the cool tea into your brew container. We used a glass 1-gallon water jar with a spigot. Make sure that your container is food grade and clean.
Grab your scoby…
and add it to the tea.
The scoby will float on top and retain its shape as the culture grows out across the surface in the days to come.

Step 3 - Cover & wait
Cover your brew container with a cloth. Hold it in place with a rubber band so that it won't touch the contents. Keep the container at 80-90°F (or 27-32°C) to prevent mold. We placed our 1-gallon jar on our stove which is always warm thanks to its pilot lights. We double checked the temperature of the jar during the first few days and found that it stayed close to 90°F even when the stove was in use.

Step 4 - Check & bottle
After about a week it starts tasting your brew. Initially, it will taste like sweet tea but over time it will start to taste like tangy kombucha. We tapped a little from our spigot each day. Use a clean spoon if your brew container doesn't have a spigot.
It is ready when it tastes good to you. Usually after 15-25 days. Your kombucha will still be flat at this point. If you like your kombucha fizzy, like I do, you should let it carbonate in a bottle for a few days. So fill some food-safe bottles that can hold pressure but leave at least 2 cups with the scoby to start another batch with.
We used a Grolsch style bottle which means it has a flip cap (also called an "EZ cap") that makes re-use straightforward. You may want to "burp" the bottle once a day to prevent a buildup of too much pressure. Though every time we released pressure, there wasn't much to release.
Put the bottle in the fridge when you have enough carbonation. That will slow down additional carbonation and keep the kombucha for quite a while. Plus it will be at the perfect temperature to enjoy it when you're thirsty. 🍻